🎧 Listen While You Read

Hit play and let the audio set the mood as we walk through the art of whiskey tasting, step by step.

You pour a dram of amber liquid into the right glass, swirl it gently, and lean in — the aroma alone feels like a story waiting to be told. Learning how to taste whiskey isn’t just about drinking; it’s about uncovering hidden layers of flavor and tradition. Whether you’re sipping your first bourbon or refining your Scotch palate, this guide will walk you through everything you need to know. From choosing the perfect glass to taking that second, flavor-packed sip, you’ll be tasting whiskey like a pro in no time.


🔑 Key Takeaways

  • 🥃 Glass matters: Use a Glencairn or Copita for the best experience.

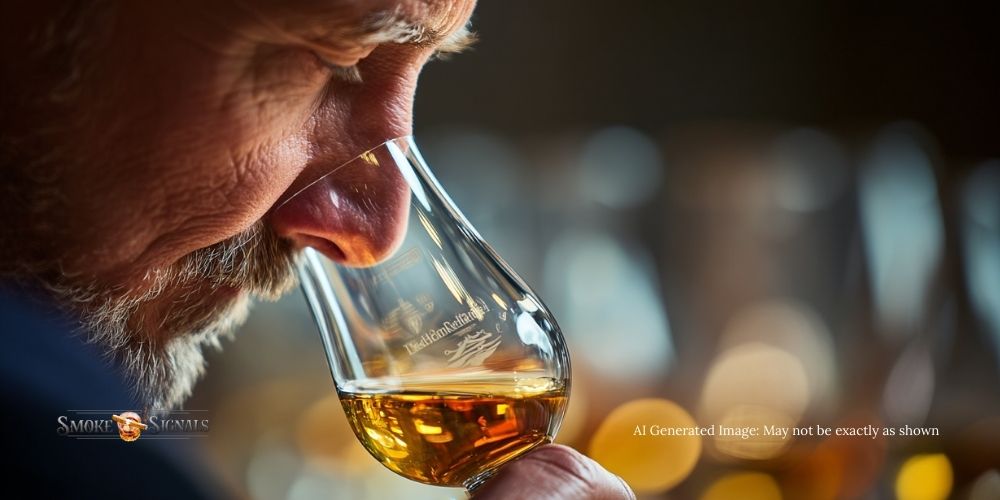
  • 👃 Nose it gently: Short sniffs reveal far more than one deep inhale.

  • 🍂 Sip in stages: First sip warms the palate, second sip unlocks the flavors.

  • 💧 Water helps: A few drops can transform the whiskey’s character.

  • Notice the finish: Pay attention to what lingers after each swallow.

Preparing for a Whiskey Tasting

Before you can dive into flavor notes, you need the right setup. Whiskey tasting isn’t complicated, but a few simple choices make all the difference in how much character you’ll uncover.

Whiskey tasting glass types compared — Glencairn, Copita, and tumbler with pours
Glass choice matters: a Glencairn or Copita enhances aromas far better than a tumbler.

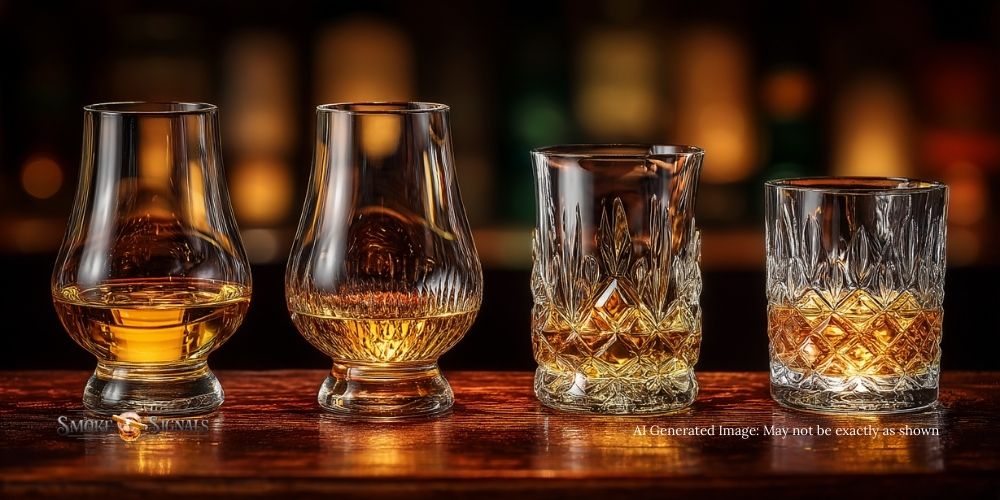
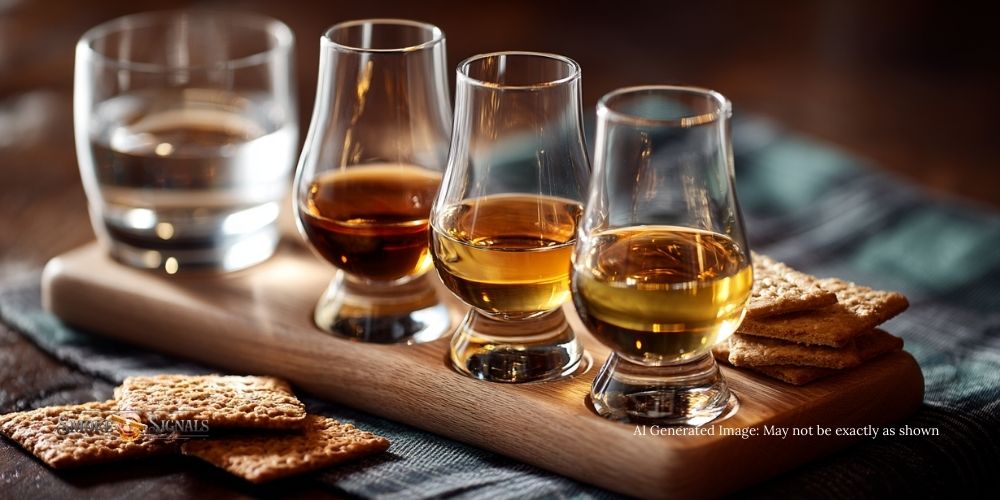
Choosing the Right Glassware

A heavy tumbler may look stylish, but it doesn’t do your whiskey any favors. For serious tasting, the Glencairn glass is the gold standard — its tulip shape concentrates aromas, letting you nose the whiskey without drowning in alcohol burn. A Copita (sometimes called a sherry glass) works just as well, and some connoisseurs even prefer it for Scotch. If you’re curious about how glassware affects flavor perception, the experts at Whisky Advocate have a great breakdown of why the Glencairn became the tasting benchmark.

Setting the Stage

Environment matters more than most people realize. Choose a quiet space free from competing smells — no candles, cooking aromas, or strong colognes. Good lighting helps you appreciate color, and room-temperature whiskey (not chilled) reveals more flavors.

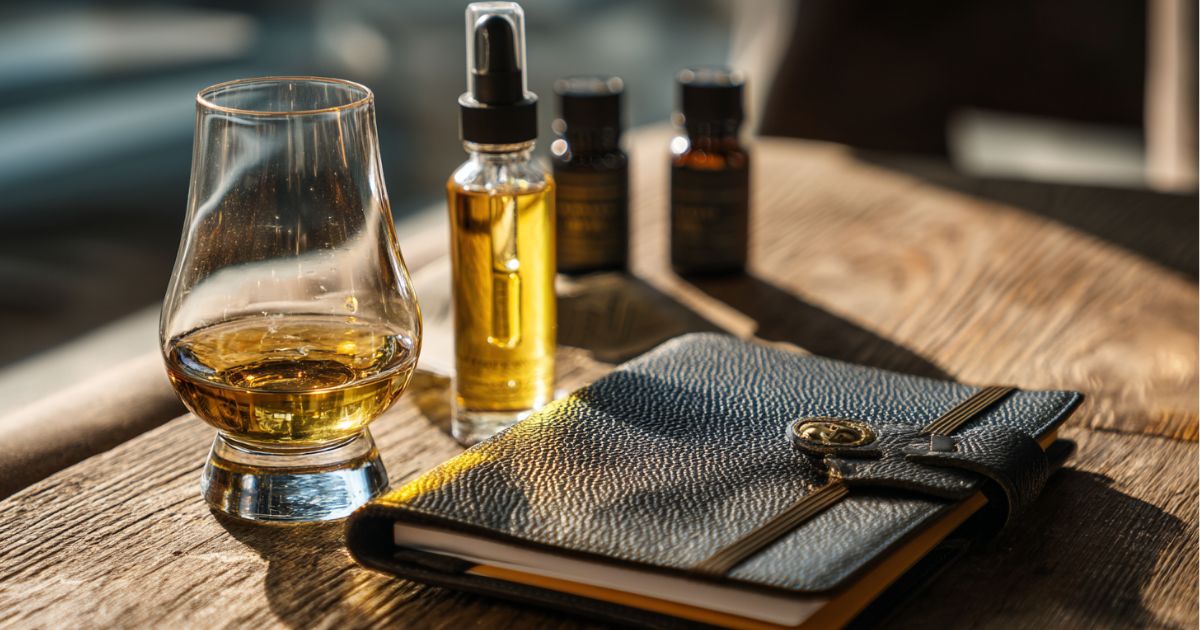
Tools to Enhance the Experience

A couple of inexpensive tools will elevate your tasting:

  • Water dropper or pipette: lets you add a precise drop or two without over-diluting.

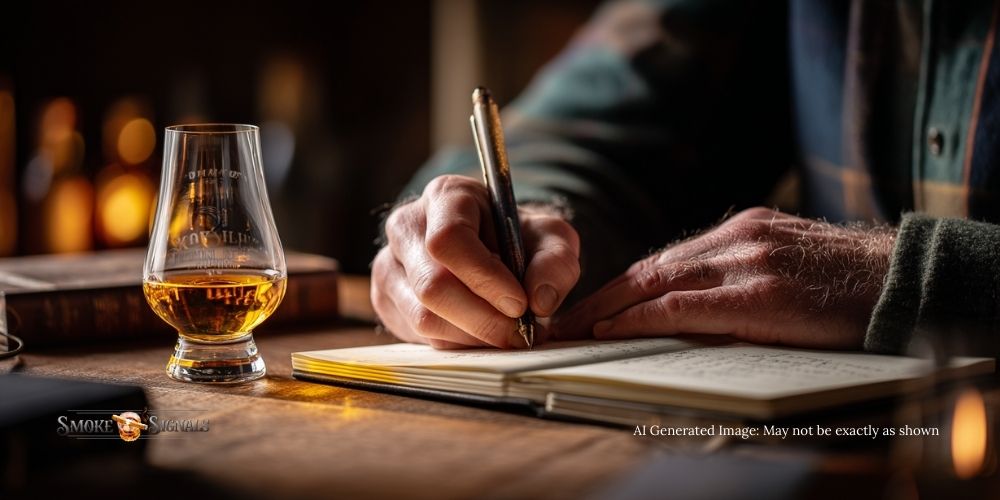
  • Tasting notebook: jot down your impressions before they fade.

  • Aroma wheel: a handy reference to train your nose across categories like fruity, floral, spicy, or smoky.

Whiskey tasting is as much about sharpening your senses as it is about the drink itself. With the right preparation, you’ll give your palate the best chance to notice every detail.

Step-by-Step Whiskey Tasting Process

Tasting whiskey isn’t about rushing through a glass — it’s about slowing down and letting each stage reveal something new. The process below is a structured way to uncover appearance, aroma, flavor, and finish, just as professional tasters do. Follow these whiskey tasting steps and you’ll start noticing details you never knew were there.

Step-by-step whiskey tasting process with Glencairn glass and nosing technique
Nosing is one of the most important whiskey tasting steps — gentle sniffs reveal hidden aromas.

Step 1 – Observe the Appearance

Hold the glass at a 45° angle against a white background. Note the color: pale straw often suggests ex-bourbon casks; deeper amber can hint at longer aging or sherry/wine casks. Give it a calm swirl and watch the “legs” or “tears” slide down the bowl. They don’t prove quality, but they can hint at body and texture. Set your intention here: you’re not just drinking; you’re decoding.

Step 2 – Nosing the Whiskey

Bring the rim just below your nose and take short, gentle sniffs. Don’t bury your nose in the glass—alcohol vapors will drown out nuance. Try “zone nosing”: sweep the rim left to right under each nostril to find where you detect aromas best. A slightly open mouth helps vent alcohol and welcomes aroma. Start broad (“fruity,” “malty,” “spicy,” “smoky”), then narrow down (green apple vs. baked apple; cinnamon vs. clove; vanilla vs. toffee). Revisit the nose after each sip—aromas evolve as the whiskey breathes.

Step 3 – The First Sip (Acclimate Your Palate)

Take a small primer sip—just enough to coat your mouth. Expect a little heat; that’s normal. Let it move gently over the tongue and cheeks, then swallow. You’re teaching your palate what’s coming so the alcohol recedes and flavors can step forward. Pause. Breathe. Return to the nose—you’ll likely pick up new notes immediately.

Step 4 – The Second Sip (Discover the Flavors)

Now take a slightly larger sip and roll it slowly across your tongue. Notice texture (silky, oily, crisp) and tempo (do flavors arrive in a quick burst or spread gradually?). Identify flavor families first—sweet (vanilla, caramel, honey), fruit (citrus, orchard, dried), grain/malt (biscuit, cereal), oak (toast, cocoa), spice (pepper, cinnamon), smoke/earth (peat, leather). Try a soft retrohale: with your mouth closed, exhale very gently through your nose right after swallowing; it can reveal hidden layers like cocoa, nuts, or herbal tones. Make a quick note of the 2–3 clearest impressions—don’t overthink; capture your first truths.

Step 5 – Adding Water (Optional)

A few precise drops of water can open the whiskey by reducing alcohol intensity and releasing volatile aromatics. Use a dropper if you can: add two drops, swirl, re-nose, and taste again. You’re looking for a shift—maybe fruit becomes brighter, oak softens, or spice organizes itself. Add water gradually; once you overshoot, you can’t go back. (Save ice for casual sipping; cold mutes aromas and compresses flavor detail.)

Step 6 – The Finish

Now focus on what lingers. Is the finish short, medium, or long? Does it travel (sweet → spice → oak), or hold steady on one theme? Common finish notes include vanilla, toffee, cocoa, baking spice, pepper, dried fruit, toasted nuts, mint, or gentle smoke. Pay attention to after-textures too—drying tannin, creamy residue, or a clean snap. Revisit the nose one last time; many drinkers find the bouquet richest after the second sip and a drop of water.


Micro-tips that multiply your results

  • Small pours, longer sessions: 20–30 ml lets you make multiple passes without fatiguing your senses.

  • Reset smartly: Sip room-temp water; use plain crackers if needed. Coffee beans aren’t required—stepping away for 60–90 seconds is usually enough.

  • Compare in flights: Lightest to boldest. Your brain detects differences faster than absolutes, which helps you name notes with confidence.

  • Write simply: Three words for nose, three for palate, two for finish. You’ll taste more by saying less.

Follow these whiskey tasting steps and you’ll move from “I like it” to why you like it—turning every glass into a guided exploration.

Whiskey tasting flight with light-to-dark pours, water glass, and crackers for palate cleansing
Tasting in a flight sharpens your senses — notice how flavors evolve from light to bold.

Tips for Getting More Notes from Your Whiskey

Tasting whiskey is part science, part mindfulness. Once you’ve mastered the core steps, these tips help unlock even more from each glass:

  • Take small sips, revisit often – Whiskey opens up as it sits. Come back to the same pour 10 or 20 minutes later and you’ll often notice new aromas or flavors that weren’t there at first.

  • Compare in a flight – Line up two or three whiskeys side by side, moving from lightest to boldest. Differences sharpen your senses and make subtle notes easier to spot.

  • Use palate cleansers – Water at room temperature is essential. Plain crackers or unsalted bread help reset your taste buds without leaving extra flavor behind.

  • Slow down – Give yourself time to notice transitions from nose to palate to finish. Rushing through misses the story each whiskey is telling.

  • Write it down – Use a tasting notebook or simple note app. Capture a few words for aroma, flavor, and finish. Over time, you’ll spot patterns that reveal your personal preferences.

Whiskey tasting is like training a muscle — the more you practice, the more detail you’ll uncover. With patience, you’ll move from broad categories (“spicy” or “sweet”) into precise descriptors like clove, maple, or baked apple. That’s when every pour becomes an adventure.

Common Mistakes Beginners Make

Even seasoned drinkers slip into habits that dull the tasting experience. Here are some of the most common pitfalls to avoid:

Using the wrong glass

A tumbler might feel traditional, but its wide mouth lets aromas escape. If you’re serious about tasting, stick to a Glencairn or Copita. The difference is immediate.

Rushing the process

Whiskey reveals itself in stages. Downing it like a shot only delivers alcohol burn. Take time to observe, nose, sip, and revisit. The reward is worth the patience.

Overfilling the pour

Two ounces may look generous, but it’s too much for a focused tasting. Stick to smaller pours (about 20–30 ml). This gives you more control and lets you sample multiple whiskeys without fatigue.

Letting other scents interfere

Perfume, cologne, scented candles, or even a nearby meal can overwhelm delicate aromas. A clean, neutral space helps your whiskey shine.

Ignoring water

Some beginners feel water “weakens” whiskey. In reality, a few drops can unlock flavors you’d otherwise miss. Approach it as a tool, not a compromise.

Avoid these traps and you’ll quickly taste whiskey with more clarity, confidence, and enjoyment.

Beyond the Basics — Developing a Whiskey Palate

Once you’re comfortable with the basics, the real fun begins: building a palate that can pick out flavors with confidence. This isn’t about showing off; it’s about deepening your enjoyment and discovering what styles you truly love.

Whiskey tasting journal with Glencairn glass and notes to record flavors and finish
Keeping tasting notes helps develop your whiskey palate and makes each dram more memorable.

Train your senses daily

You don’t need whiskey in your glass to sharpen your skills. Take time to smell fresh fruit at the market, sniff spice jars in your kitchen, or pay attention to the aroma of roasted coffee or fresh bread. These everyday scents build your flavor memory, making it easier to recognize them later in a whiskey.

Explore different regions and styles

Scotch from Islay brings smoky peat, while Speyside leans fruity and floral. Irish whiskey often feels lighter and smoother, while bourbon carries rich vanilla and caramel from new oak. Tasting across regions is like giving your palate a world tour.

Taste with others

Group tastings add perspective. A note you describe as “toffee” might be “maple” to someone else, and hearing those comparisons stretches your own vocabulary. Plus, shared discovery makes whiskey more social and memorable.  Here is a guide on how to host a whiskey tasting for your friends.

Developing a whiskey palate isn’t about mastering a checklist of flavors. It’s about tuning in, practicing often, and learning which drams bring you the most joy.

Final Thoughts

Learning how to taste whiskey is less about rules and more about discovery. With the right glass, a little patience, and a mindful approach, every pour becomes a story — from the first swirl to the lingering finish. Each step reveals something new about the spirit and about your own preferences.

If you’ve enjoyed this guide, there’s plenty more waiting. Join me over on Smoke Signals on Substack, where we explore cigar and whiskey pairings, reviews, and lifestyle stories that bring the leaf and the dram to life. Subscribe today and never miss a pour worth savoring.

Frequently Asked Questions

Whiskey tasting often sparks as many questions as it answers. Here are some of the most common ones, with quick tips to help you taste with more confidence.

What is the best glass for tasting whiskey?

The Glencairn glass is widely considered the best option because its tulip shape captures aromas and reduces alcohol burn. A Copita is also excellent, while a tumbler is fine for casual sipping but not ideal for a focused whiskey tasting guide.

How do you nose whiskey without the alcohol burn?

Hold the glass slightly below your nose and take short, gentle sniffs instead of one deep inhale. Keep your mouth slightly open to vent alcohol vapors. This method reveals more delicate notes like fruit, spice, or floral aromas without overwhelming your senses.

Should you drink whiskey neat or with water?

Both are correct. Tasting whiskey neat helps you understand its core profile, while adding a few drops of water can soften alcohol and unlock hidden flavors. Avoid ice during whiskey tasting steps, since chilling masks aromas and reduces detail.

How many steps are in a whiskey tasting?

A structured whiskey tasting usually includes six steps: observing appearance, nosing, the first sip, a second sip to discover flavor notes, adding water (optional), and evaluating the finish. These whiskey tasting steps are designed to reveal the spirit’s complexity layer by layer.

What’s the difference between sipping whiskey and tasting whiskey?

Sipping whiskey is about casual enjoyment, while tasting whiskey involves intentional steps to notice appearance, aroma, palate, and finish. A proper whiskey tasting guide helps you identify specific notes and compare different whiskeys more thoughtfully.


Still have questions? Drop them in the comments or join the conversation on Smoke Signals Substack, where we explore whiskey tasting tips, glass types, and cigar pairings in even more depth.

Leave a Reply

Your email address will not be published. Required fields are marked *